

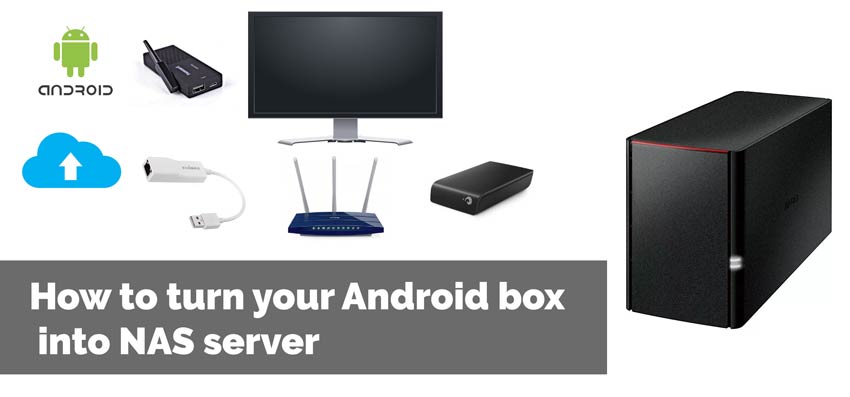
Turning your device using Android TV box to NAS server (Network Attached Storage) is not as hard as you might think.
In this short post I will show you how I transformed my Android device (Tronsmark MK908II) into a fully working NAS. I think this is possibly the cheapest NAS solution (aprox 180$USD including the Android TV box)
If you are into streaming video games, you can use this setup as an extension to your live streaming studio. I’ve recently written an article about hardware for streaming, so check that out if that’s something interesting for you.
Android to NAS Drive – Hardware used
Update: The Tronsmart Android mini PC stick is a bit dated and perhaps difficult to buy these days. However, there are newer and quite better alternatives like the Transpeed TV Stick Android 11.0 4K 2GB RAM 16GB available for an amazing $36.
For this setup I used the following setup:
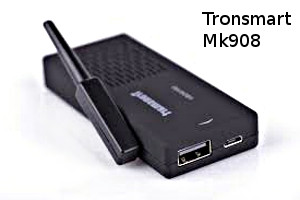
- Tronsmart MK908II RK3188T Cortex-A9 Quad Core 1.4GHz Google Android 4.2 Mini TV BOX 2G/8G Bluetooth External Wifi Antenna-Black – this is a rooted Android device that can be hooked up to any TV via HDMI and it turns it into a Smart TV (costed about 65USD)
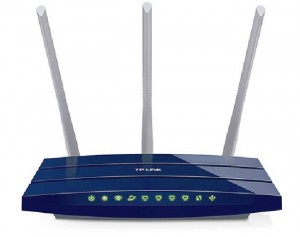
Tronsmart MK908II - 450Mbps Wireless N Gigabit RouterTL-WR1043ND – this is the wireless router that hooks everything to the internet. You can basically do this Android to NAS server setup with most wireless routers these days. I used this TP Link because that’s what I had. It also has a few very useful features like dynamic DNS and it has a USB port which in my case I used to power up the mini Android TV box such that it always stays on (my router costed about 57USD – you can check the best price for this wireless router on Amazon)
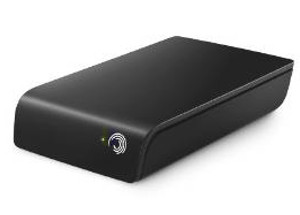
TPLink Wireless Router - a 1TB external HDD drive (mine costed about 50USD) – of course, any external HDD or external SSD will do fine, so check on Amazon for similar external HDD
Seagate 1TB external usb hdd drive - (optional) Edimax USB 2.0 to Fast Ethernet Adapter (EU-4208) – I used this to hook up the mini TV box to the internet via ethernet to get higher speeds; it’s optional because the tv box already has wireless included so it can use that to connect to the internet (costed about 23USD – but, you can get it for 14$ from Amazon here)
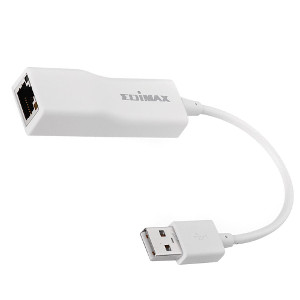
Edimax USB 2.0 to Fast Ethernet Adapter (EU-4208)


The whole setup costed in total approximately 183 USD (maybe you can even get it as low as 170$) which is about or lower than the cost of the cheapest NAS which does not have all the bells and whistles that this setup offers to us.
The cheapest NAS solution I could find on Amazon was this the Buffalo LinkStation 220 which sells for about 221$, but if you also add the cost for the Android box, you end up at around 285$.
I did not include the TV in this setup because I assume everybody has nowadays a TV with HDMI input.
So, hook up the mini TV box to the TV via HDMI, the HDD and ethernet adapter hook via USB to the mini TV box, then the mini TV box powers via USB from the wireless router and also is connected to it via the ethernet cable. That’s all.
Android software used
To mimic the features offered by a regular NAS I have used the following software, coming free straight from the Google Play Store:
- SSH Server – this application offers SSH access to your device with everything that implies: remote administration and SFTP being the most important
- Android Samba Server – your device (with the HDD attached) becomes a drive on the network accessible from Windows networks
- tTorrent Lite – torrent client that offers a simple web interface that allows remote management of your torrent downloads
- MXPlayer – very good video player; has a nice feature for searching and downloading subtitles; has had some copyright problems with AC3 and DTS audio encoding, but that is easily solved using a free plugin
These are the minimum software needed which offer SFTP, Windows sharing, torrent download and remote management, etc. Of course you can do pretty much anything since there are a lot of apps for Android.
How to connect everything?
The connection of the devices is pretty straight forward:
- the router just goes in a power plug
- Tronsmart mini TV box – gets power via USB from the router (my router has an external storage USB port); I did it like this because my router is always on and so will the mini TV box; you can also connect it to a regular power plug or even to your TV (but then the mini TV box will only be on when you turn on the TV)
- Tronsmart mini TV box – connects to the TV via an HDMI cable
- the Edimax ethernet adapter gets into the Tronsmart mini TV box via USB and also connects via UTP to the router
- the external USB drive connects to the Tronsmart mini TV box via USB
Android NAS Setup
Configure the router
Most of the configuration will be made on the router. These are a few configurations that I’ve done on my wireless router:
- I activated DHCP to for automatic assignment of IPs
- I activated dynamic DNS (DDNS) – this is a very cool feature that my router has and this allows me to map a web domain to my IP address (which is dynamicalyy assigned by my internet provider); using the mapped web domain I can always access my NAS from the internet. This will act as your personal Android NAS cloud storage
- port forwarding: I forwarded several ports such that I can access from the internet my mini TV box; the ports include the SSH port (the one you set in the SSH application) and the tTorrent web server port (allowing me to manage torrent downloads remotely)
Configure the Android device
On the Android device you will need to activate the Ethernet connection which is by default disabled.
The Edimax ethernet adapter is compatible with the kernel used on Tronsmart Mk908, so for me this worked almost seamless. I say almost because for some reason the ethernet interface did not automatically get the DNS from the router. That’s probably not going to be an issue for you.
As I already mentioned you have to configure your SSH, Samba application and your tTorrent mainly for:
- starting the services on boot-up of the device
- setting the ports you want to use
- quite important, setting a password for accessing these services otherwise you open the gate for everybody
Android to NAS Server: What Features Did I Get?
To recap here’s what my Android to NAS server has/can do:
- NAS cloud storage
- Remote control via the Android SSH server
- NAS Samba Server for sharing on Windows networks
- NAS torrenting client via the Android tTorrent client
- Network media player using the Android MXPlayer application
This is all. It’s not exactly an out of the box setup, but then neither is a regular NAS as you still have to do similar configurations. The bottom line is that it works and for me at least it was a fun project.
If you have any questions regarding this setup please drop me a comment and i will try to help you.