
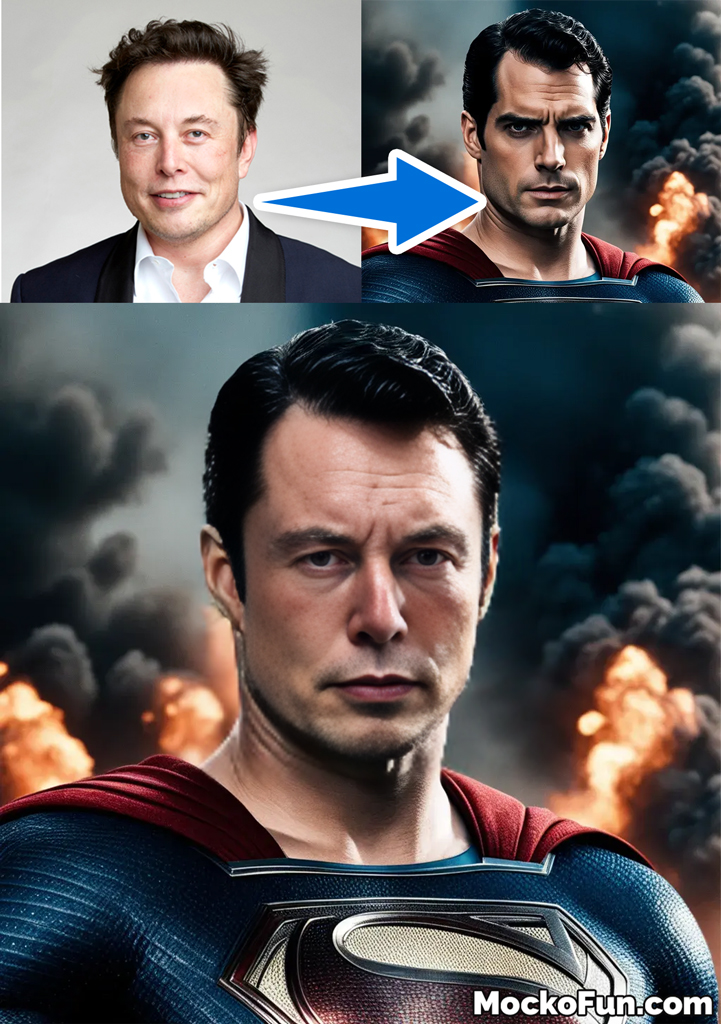
Have you ever wanted to swap faces between two images? Perhaps you’d like to put your friend’s face on a celebrity’s body or create a funny meme by swapping faces. Whatever the reason, this Python script leverages the OpenCV and dlib libraries to make face swapping a reality.
You can download the face swap Python script here:
https://github.com/codingdudecom/faceswap/blob/master/faceswap.py
Please note that there are far better solutions for this, and I highly recommend the online face swap app from MockoFun. It’s free and renders high quality results fast.
How to Install and Run the Face Swap Python Script
We should note that this script requires a pre-trained facial landmark detector model before diving into the code. The script uses this model to identify key facial features like the eyes, nose, mouth, and jawline. You can download the required model file (shape_predictor_68_face_landmarks.dat) from the dlib website.
Now, let’s break down the code step-by-step:
- Import Required Libraries: The script starts by importing the necessary libraries:
cv2(OpenCV for image processing),dlib(for facial landmark detection), andnumpy(for numerical operations). - Define Landmark Points: The code defines various lists of landmark points that correspond to different facial features, such as the mouth, nose, eyes, and jawline. The script uses these landmarks to align the faces and determine the region to swap.
- Load Facial Landmark Detector: The
dlib.get_frontal_face_detector()function is used to load a pre-trained face detector, anddlib.shape_predictor()loads the facial landmark detector model. - Get Facial Landmarks: The
get_landmarks()function takes an image as input and uses the face detector and landmark predictor to find facial landmarks. It returns a matrix of (x, y) coordinates for each landmark point. - Align Faces: The
transformation_from_points()function calculates an affine transformation matrix that aligns the two faces based on a subset of landmark points (e.g., eyes, nose, and mouth). - Create Face Mask: The
get_face_mask()function creates a mask that covers the face region of the second image. This mask is used to overlay the face from the second image onto the first image. - Warp and Correct Colors: The second image is warped (transformed) using the affine transformation matrix calculated earlier, and its colors are corrected to match the first image using the
correct_colours()function. - Combine Images: Finally, the script combines the face region from the warped and color-corrected second image with the first image using the face mask, effectively swapping the faces between the two images.
- Save Output: The script saves the resulting image with the swapped faces as
output.jpg.
To use this script, you’ll need to provide the file paths of the two input images as command-line arguments. For example:
python face_swap.py image1.jpg image2.jpgThis will create an output.jpg file containing the first image with the face swapped from the second image.
Keep in mind that the accuracy of the face swap depends on the quality of the input images and the facial landmark detection. The script works best with frontal, well-lit images of faces without occlusions or extreme expressions.
Face swapping can be a fun way to create amusing images or memes, but it’s important to use this technology responsibly and respect individuals’ privacy and consent.
How Face Swapping Works
AI has come a long way, and there are far superior methods for swapping faces in photos than this script. If you’re curious about the science of face swapping then read this article. But, let’s see how this script works.
Facial Landmark Detection
Facial landmarks are specific points on a human face that are used to describe and map the facial features and shape. Common facial landmarks include points around the eyes, eyebrows, nose, mouth, jaw, and other distinctive areas. These landmarks serve as a standardized way to represent and analyze facial structures.
The facial landmark detector used in this face swapping script is based on a machine learning model trained to automatically locate and identify these key landmark points on any given face image. Let’s dive a bit deeper into how this landmark detection works:
- Training Data: The facial landmark detector model is trained on a large dataset of manually labeled face images, where human annotators have marked the locations of dozens of facial landmarks like eye corners, nose tip, mouth corners etc.
- Feature Extraction: During training, the model learns to extract meaningful facial features and patterns from the image data that are discriminative for predicting the landmark locations accurately.
- Regression Model: The landmark detector uses a regression model approach, where it learns a mapping function from the image features to the 2D coordinates (x, y) of each landmark point.
- Machine Learning Model: Common machine learning models used for facial landmark detection include random forests, support vector machines, convolutional neural networks etc. The dlib library used in this script employs an ensemble of regression trees.
- Landmark Prediction: When a new face image is passed to the trained landmark detector model, it extracts the same features and runs them through the regression function to predict the 2D coordinates of all the defined facial landmarks on that particular face.
The landmark detector’s accuracy is critical for the overall face swapping quality. Precise landmark points help properly align the faces, isolate the face region to swap, and generate a seamless blending of features from the two images.
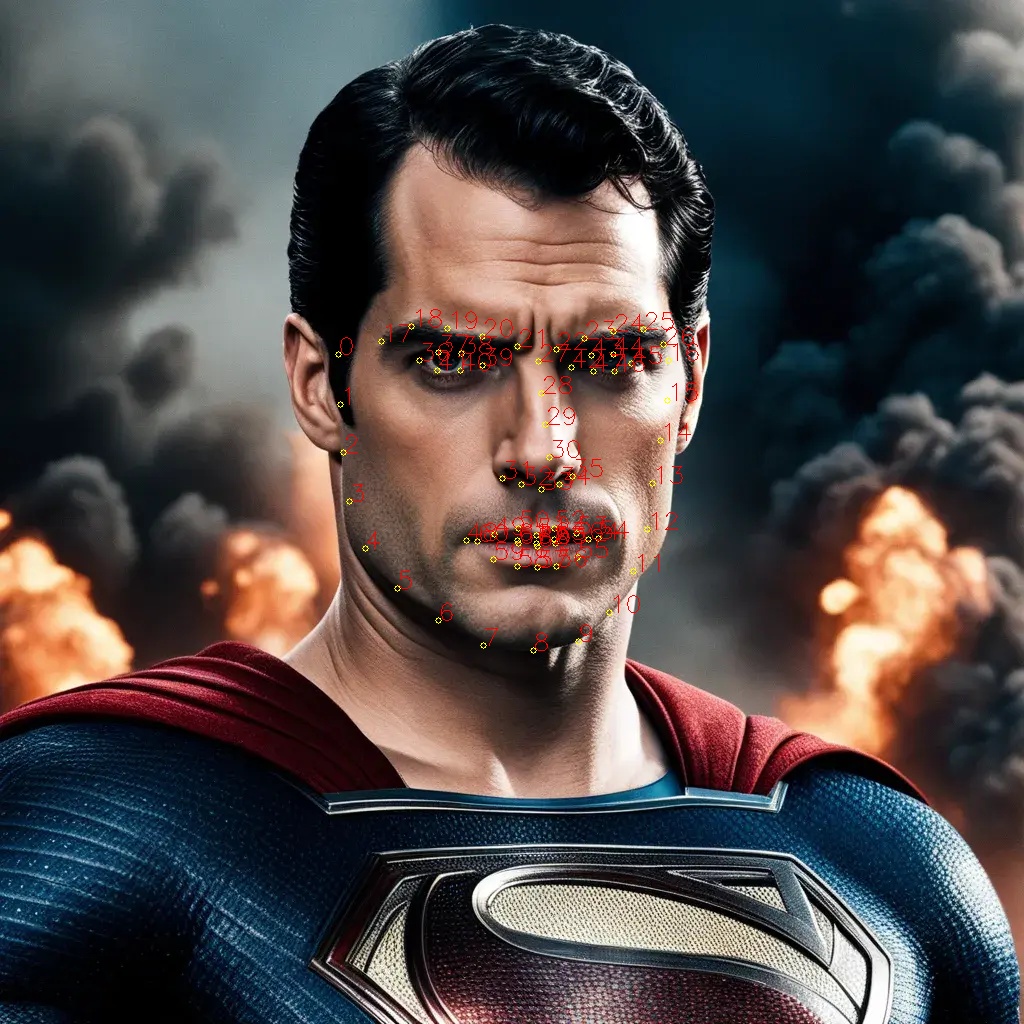
Add the following code if you want to draw the facial landmarks that the script recognizes:
def annotate_landmarks(im, landmarks):
    im = im.copy()
    for idx, point in enumerate(landmarks):
        pos = (point[0, 0], point[0, 1])
        cv2.putText(im, str(idx), pos,
                    fontFace=cv2.FONT_HERSHEY_SCRIPT_SIMPLEX,
                    fontScale=0.4,
                    color=(0, 0, 255))
        cv2.circle(im, pos, 3, color=(0, 255, 255))
    return im
When you call this function on the landmark array extracted from the image you get something like:

Some key advantages of using facial landmarks over simpler techniques like bounding box face detection are:
- Rich spatial encoding of facial geometry and features
- Better handling of varying face orientations and angles
- Ability to isolate and morph specific facial regions like eyes, mouth etc.
While the provided code uses a pre-trained landmark detector model, it’s also possible to train custom landmark detectors by annotating face datasets with application-specific landmark definitions.
So in summary, facial landmark detectors use machine learning on labeled face data to learn patterns that allow them to reliably predict the spatial coordinates of key facial points, enabling sophisticated face analysis, manipulation and synthesis applications like the face swap implemented here.
Facial Landmark Alignment, Face Mask and Warping
Facial landmarks are used to calculate an affine transformation that aligns the two faces. A face mask is created for the second image by drawing filled convex hulls around specific facial features.
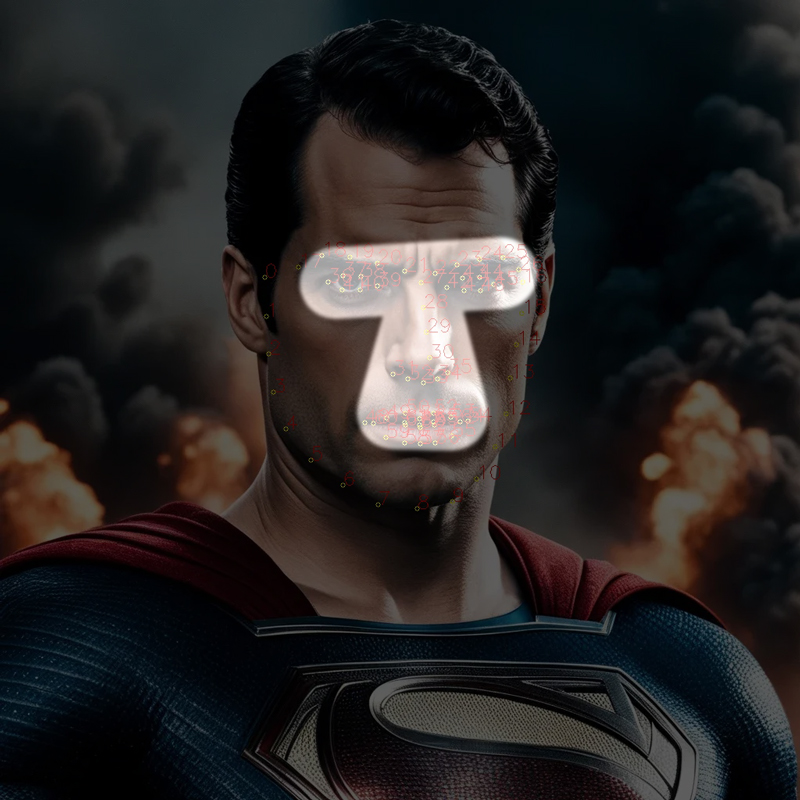
The second image is warped (transformed) using the alignment transformation, making its face match the orientation and scale of the first image’s face.
The warped second image’s face region, determined by the face mask, is then blended onto the first image to complete the face swap.
This process of alignment, masking, and warping ensures that the swapped face from the second image is geometrically aligned and properly overlaid onto the first image’s body and background.
Color Correction
def correct_colours(im1, im2, landmarks1):
    blur_amount = COLOUR_CORRECT_BLUR_FRAC * numpy.linalg.norm(
                              numpy.mean(landmarks1[LEFT_EYE_POINTS], axis=0) -
                              numpy.mean(landmarks1[RIGHT_EYE_POINTS], axis=0))
    blur_amount = int(blur_amount)
    if blur_amount % 2 == 0:
        blur_amount += 1
    im1_blur = cv2.GaussianBlur(im1, (blur_amount, blur_amount), 0)
    im2_blur = cv2.GaussianBlur(im2, (blur_amount, blur_amount), 0)

    # Avoid divide-by-zero errors.
    im2_blur += (128 * (im2_blur <= 1.0)).astype(im2_blur.dtype)

    return (im2.astype(numpy.float64) * im1_blur.astype(numpy.float64) /
                                                im2_blur.astype(numpy.float64))
The correct_colours function is used to adjust the colors of one image to match the color characteristics of another image. This is an important step in face swapping, as it helps to blend the swapped face more seamlessly into the target image by matching its colors.
Here’s a breakdown of what the function does:
- It calculates a
blur_amountbased on the distance between the left and right eye landmarks of the face inim1. This blur amount is used to apply a Gaussian blur to both images (im1andim2). The blur helps to smooth out the colors and reduce noise. - The
cv2.GaussianBlurfunction from the OpenCV library is used to apply the Gaussian blur to both images (im1_blurandim2_blur). - To avoid divide-by-zero errors, a small constant value (128) is added to
im2_blurwherever its pixel values are very small (less than or equal to 1.0). - The function then performs a pixel-wise division of
im2byim2_blur, and multiplies the result withim1_blur. This operation essentially transfers the color characteristics ofim1_blurtoim2, while preserving the structural details ofim2.
The key idea behind this color correction is to use the blurred version of the target image (im1_blur) as a guide to adjust the colors of the source image (im2). By dividing im2 by its blurred version (im2_blur), the function normalizes the color values of im2. Then, by multiplying this normalized version with im1_blur, it applies the color characteristics of im1 to im2.
This color correction step is crucial for face swapping, as it helps to make the swapped face look more natural and consistent with the target image’s lighting and color conditions.
Creating an Executable with PyInstaller
To distribute and use the face swapping script as a standalone application, you can create an executable file using PyInstaller. PyInstaller is a Python utility that packages Python scripts and their dependencies into a single executable file, making it easier to distribute and run the script without requiring a Python installation on the target machine.
To create an executable with PyInstaller, you would typically follow these steps:
- Install PyInstaller using pip:
pip install pyinstaller - Navigate to the directory containing your face swapping script.
- Run the following command:
pyinstaller --onefile face_swap.py - This will create a standalone executable file (
face_swap.exeon Windows orface_swapon Unix-based systems) in thedistfolder.
With the executable, users can run the face swapping script from the command line by providing the input image file paths as arguments:
face_swap.exe image1.jpg image2.jpgIntegrating as a Photoshop Extension
Interestingly, there is an extension available on Gumroad Face Swap in Photoshop that integrates the face swapping functionality directly into Adobe Photoshop. This extension allows users to swap faces between images within the familiar Photoshop interface, streamlining the process and providing a more user-friendly experience.
By incorporating face swapping capabilities into popular image editing software like Photoshop, artists, designers, and photographers can seamlessly incorporate face swapping into their existing workflows. This integration also opens up new creative possibilities and expands the range of tools available for image manipulation and compositing.
Whether used as a standalone command-line tool or integrated into professional software, the face swapping script showcases the innovative applications of computer vision and image processing techniques, enabling users to explore new realms of creativity and problem-solving.
Conclusion
The face swapping script demonstrates the power of computer vision and image processing techniques. It manipulates and combines facial features from different images. The script leverages OpenCV and dlib libraries. It can accurately detect facial landmarks and align faces. It can seamlessly blend the face region from one image onto another.
Users can leverage the script for lighthearted entertainment purposes, such as creating amusing memes or special effects. However, the script also finds practical applications in various fields, including:
Possible Applications:
- Entertainment Industry: Movie studios can employ face swapping in post-production, video editing, and special effects to seamlessly integrate actors’ faces into different scenes or create digital makeup effects.
- Law Enforcement: Generating aged or disguised images of suspects can aid in criminal investigations and aid in identifying individuals over time.
- Medical Research: Researchers could use face swapping to visualize potential surgical outcomes or study the effects of facial reconstruction procedures.
- Accessibility: Developers could adapt face swapping technology to create personalized avatars or virtual assistants for individuals with disabilities or unique facial features.