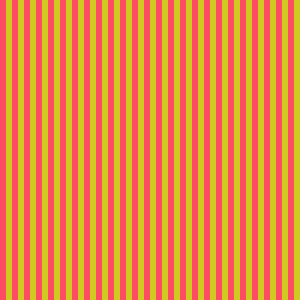
In this tutorial I will show you how to draw a line pattern using JavaScript and the HTML5 canvas. Drawing with HTML5 canvas is not too difficult and it only requires some basic HTML and JavaScript knowledge. At the end of this tutorial you know how to do simple drawing using HTML5 canvas and JavaScript and how to write code to create line patterns and colored stripe patterns that you can use for website backgrounds for example.
Level: Beginner
Duration: 10 min
Skills required: HTML, JavaScript
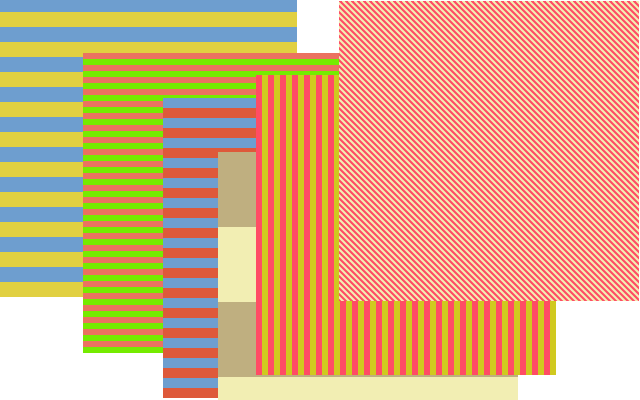
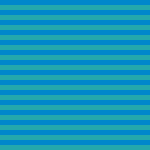
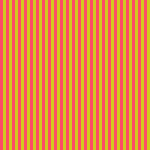
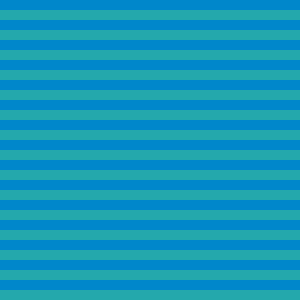
We will create several line patterns that will look like this:
Let’s start and see how we can draw these patterns using HTML5.
1. Draw a line using HTML5 canvas
To start drawing with canvas HTML5 we will only need a text editor and a browser. Please note that some of the features of HTML5 canvas are not available when using a local HTML file and they will require that the HTML file is on a server. We will get to that later in this tutorial.
Step 1 – Setting up the canvas
So, create a new file and call it index.html with the following content:
[html]
<!DOCTYPE html>
<html>
<body>
<canvas id=”myCanvas” width=”300″ height=”300″></canvas>
</body>
</html>
[/html]
Inside this file we have a standard HTML structure and within the <body> element we have a <canvas id="myCanvas"> tag. We have set the ID attribute of canvas to allow us to reference it in our code. We have also indicated a 300px width and height for the canvas.
Step 2 – Using JavaScript to draw a line on the canvas
Now for the JavaScript code we will add a <script> tag right before the closing tag </body>. We will add it there because when the page loads it will first load the <canvas> element and then reach the JS code that will use the canvas for drawing. Inside the JS code we will draw a simple line.
[html]<!DOCTYPE html>
<html>
<body>
<canvas id=”myCanvas” width=”300″ height=”300″></canvas>
<script type=”text/javascript”>
var myCanvas = document.getElementById(“myCanvas”);
var drawingContext = myCanvas.getContext(“2d”);
drawingContext.strokeStyle = “#000000”;
drawingContext.moveTo(50,150);
drawingContext.lineTo(250,150);
drawingContext.stroke();
</script>
</body>
</html>[/html]
What the JavaScript does is first getting a reference to the canvas element using document.getElementById("myCanvas"). Then, in order to draw on the canvas we have to get a reference to the 2D drawing context of the canvas by calling myCanvas.getContext("2d").
On the next line we set the strokeStyle for the drawing context to a bright red #ff0000. This will determine the color with which we draw lines.
The canvas uses a X,Y coordinates sytem where X indicates the horizontal offset and Y indicates the vertical offset. Positive values in this coordinates system go from top to bottom and left to right meaning that the point with coordinates 0,0 is at the top left corner of the canvas.
Now, to draw the line on the canvas first we have to move to the starting point of the line using the moveTo() method and then indicate that we want to draw a line to another point by calling the lineTo() method. To actually draw the line on the canvas we have to call the stroke() method.
Here’s the resulting simple line on the canvas
See the Pen HTML5 Canvas – Drawing a line by Ion Emil Negoita (@inegoita) on CodePen.16997
Drawing a line might seem the simplest of things, but even for graphic designers, it’s very important to know all the details of how digital drawing works. If you are into graphic design, check out this very thorough tutorial on how to draw a line in Photoshop.
2. Create line patterns
Drawing a simple line on the canvas might not seem that much, but it’s actually a very powerful feature as you will see next because this will allow us to create more complex line patterns.
Step 1 – Drawing multiple lines on a canvas
We’ve seen how to draw one line, but what about more lines. Let’s modify our example from above to create 10 lines instead of one. We will use some randomly generated coordinates:
[javascript]…
var myCanvas = document.getElementById(“myCanvas”);
var drawingContext = myCanvas.getContext(“2d”);
drawingContext.strokeStyle = “#FF0000”;
drawingContext.moveTo(Math.random()*300,Math.random()*300);
for (var i=0;i < 10;i++){
drawingContext.lineTo(Math.random()*300,Math.random()*300);
}
drawingContext.stroke();
… [/javascript]
First we modified the starting coordinates to a random position using Math.random() which returns a number between 0 and 1, multiplied by 300 – the width/height of the canvas. This will place the starting point randomly on the canvas.
Then, inside a for loop we are drawing 10 lines. Please note here that we only call lineTo() without calling moveTo() for every line. That will draw a line between the starting point and the end point and use the end point as a starting point for the next line. We have also used the Math.random() function for generating random points for the lines.
Here are the random lines on the canvas
See the Pen HTML5 Canvas – Drawing multiple lines by Ion Emil Negoita (@inegoita) on CodePen.16997
Drawing contigous lines (that’s the fancy name for lines connected at one point) is fine, but what about if we want to draw separate lines? Let’s modify the JavaScript code to do just that.
[javascript]…
var myCanvas = document.getElementById(“myCanvas”);
var drawingContext = myCanvas.getContext(“2d”);
drawingContext.strokeStyle = “#FF0000”;
for (var i=0;i < 10;i++){
drawingContext.moveTo(Math.random()*300,Math.random()*300);
drawingContext.lineTo(Math.random()*300,Math.random()*300);
}
drawingContext.stroke();
…
[/javascript]
Do you notice what changed? We only moved the moveTo() function inside the for loop and this is the result:
See the Pen HTML5 Canvas – Drawing separate multiple lines by Ion Emil Negoita (@inegoita) on CodePen.16997
Step 3 – Drawing different line styles and colors with the canvas
As you can see with a very few simple JavaScript lines we are starting to draw more and more complex line patterns. Let’s see what more we can do. For example, let’s see how we can draw a line pattern using lines with different colors and thickness.
Besides being a programmer, I’m also a graphic designer. And, even though I use Photoshop a lot, I kind of always start my drawings on paper. But this creates a problem: how do I transform my paper drawings to digital drawings? Here’s a cool trick on how to transform a photo to line art using Photoshop. You can get really clean line art designs like this. But, let’s come back to our line pattern drawing with JS.
We have seen earlier that setting the canvas drawing color we have to set the strokeStyle property. What about setting how thick a line is? This is done by setting the lineWidth property. This property is set in pixels.
[javascript]…
var myCanvas = document.getElementById(“myCanvas”);
var drawingContext = myCanvas.getContext(“2d”);
var colors = [“#75EB00”, “#53BBF4”, “#FF85CB”, “#FF432E”, “#FFAC00”, ];
for (var i = 0; i < 10; i++) {
drawingContext.beginPath();
drawingContext.strokeStyle = colors[i % colors.length];
drawingContext.lineWidth = Math.random() * 40;
drawingContext.moveTo(Math.random() * 300, Math.random() * 300);
drawingContext.lineTo(Math.random() * 300, Math.random() * 300);
drawingContext.stroke();
}
…
[/javascript]
We added the colors array to hold a few color codes which we access inside the loop when we set the strokeStyle property. i % colors.length is the mod operator in JavaScript, meaning that it will always give a number smaller than the length of the colors array.
We also added the beginPath() method. This was not required in the earlier examples since we considered all the lines as part of the same figure or path as it’s called in HTML5 canvas terms. As we want to change the color and thickness of each line, we call the beginPath() method to indicate that we are starting to draw a different path and therefore we can set different properties to it.
Setting the lineWitdth property will determine how thick the lines will be and we used a random value between 0 and 40 for this. We should also notice that the stroke() method call is now within the for loop because we are now drawing individual lines (different paths) with different styles.
Let’s take a look at what the code produces:
See the Pen HTML5 Canvas – Drawing multiple lines with different colors and thickness by Ion Emil Negoita (@inegoita) on CodePen.16997
Step 4 – Making a seamless lines pattern
Let’s now see how we can draw some seamless lines patterns.
In the previous parts of this tutorial we have seen how we can draw random line patterns. This is useful and can produce some nice results, however, to get even more interesting results we will look at creating seamless patterns using lines drawing on the canvas.
Seamless patterns or repeatable patterns means that if you place two such patterns next to each other horizontally or vertically they will line up perfectly.
Horizontal line pattern
To create any seamless pattern we first have to be aware of the size of the pattern. In our case, since we are creating a line pattern on the canvas, the size of the pattern is the size of the canvas. Let’s make a horizontal line pattern or a striped pattern using two colors.
Our canvas is 300 x 300 and to make a seamless patter we will have to draw an even number of lines alternating the colors. To determine the thickness of the lines we have to divide the height of the pattern by the number of the lines.
Let’s see how the JavaScript code for drawing the horizontal lines pattern looks like.
[javascript]var myCanvas = document.getElementById(“myCanvas”);
var drawingContext = myCanvas.getContext(“2d”);
var color1 = “#24A8AC”,color2=”#0087CB”;
var numberOfStripes = 30;
for (var i=0;i < numberOfStripes;i++){
var thickness = 300 / numberOfStripes;
drawingContext.beginPath();
drawingContext.strokeStyle = i % 2?color1:color2;
drawingContext.lineWidth =thickness;
drawingContext.moveTo(0,i*thickness + thickness/2);
drawingContext.lineTo(300,i*thickness + thickness/2);
drawingContext.stroke();
}
[/javascript]
In the code above we draw successive horizontal lines to form the lines pattern using color1 and color2. You will notice that when drawing the lines we add thickness/2 to the Y coordinate. We do this because the coordinates refer to the thickness middle of the line and half of the width of the first line would go outside of the canvas. This is how the horizontal lines pattern looks like:
See the Pen HTML5 Canvas – Drawing horizontal lines pattern by Ion Emil Negoita (@inegoita) on CodePen.16997
The advantage of taking a mathematical approach to drawing the stripped pattern is that we can simply change the number of lines by changing the numberOfStripes variable and we get a seamless pattern of lines with the thickness of the lines being calculated automatically.
Vertical lines pattern
How about if we want to draw a vertical lines pattern? It’s actually very simple, we only need to replace the 2 lines of code that do the drawing with this:
[javascript]
drawingContext.moveTo(i*thickness + thickness/2,0);
drawingContext.lineTo(i*thickness+thickness/2,300);
[/javascript]
and the resulting line pattern looks like this (with changed colors and more lines just for shows)
See the Pen HTML5 Canvas – Drawing vertical lines pattern by Ion Emil Negoita (@inegoita) on CodePen.16997
Diagonal line pattern
I’m sure you got the idea by now, but let’s look at another line pattern – diagonal lines pattern. The question would be how to properly draw this patter such that it’s seamless. Because we have a square canvas, the easiest way to make a simple diagonal lines pattern is to draw the lines at a 45 deg angle.
To do that we can start from a vertical lines pattern and simply move the starting point of all the lines to the left by 300. One important thing to note here is that we are allowed to use negative coordinates when drawing on the canvas. Anything drawn in the negative domain or outside the size of the canvas will not be visible, of course.
However, by moving the starting point of the lines we will only cover half of the canvas. So, we can use a trick, by extending the for loop to twice the number of lines. Let’s see the code:
[javascript]
var myCanvas = document.getElementById(“myCanvas”);
var drawingContext = myCanvas.getContext(“2d”);
var color1 = “#F2EEB3″,color2=”#FF4C65”;
var numberOfStripes = 100;
for (var i=0;i < numberOfStripes*2;i++){
var thickness = 300 / numberOfStripes;
drawingContext.beginPath();
drawingContext.strokeStyle = i % 2?color1:color2;
drawingContext.lineWidth =thickness;
drawingContext.lineCap = ’round’;
drawingContext.moveTo(i*thickness + thickness/2 – 300,0);
drawingContext.lineTo(0 + i*thickness+thickness/2,300);
drawingContext.stroke();
}
[/javascript]
In the code we also notice a new setting lineCap set to round. This setting makes the ends of the lines rounded. We use this setting because by default the lines are squared at the end and if we draw diagonal lines there will be some un-covered areas which will make the pattern not seamless. Here is how the diagonal lines pattern looks like
See the Pen HTML5 Canvas – Drawing diagonal lines pattern by Ion Emil Negoita (@inegoita) on CodePen.16997
3. Saving and using the line pattern as PNG images
Now that we have seen how to draw various line patterns, how we use these line patterns for web design. Of course, we could try and draw multiple canvases all over our HTML design, but that’s quite unpractical. The HTML5 canvas has a very handy feature in that it allows saving the drawn content as an image. To do that we have 2 methods
Method 1 – Right click on the canvas and use Save image as…
Using the mouse right click on the canvas will open up the contextual menu where you can choose the Save image as… option. This will allow saving the canvas content as a PNG image. Once saved we can use the image containing the lines pattern in our designs just like any other image.
Method 2 – Convert canvas to image using JavaScript
Saving the content as an image like above is fine, but what if we want to draw a lines pattern and in real time use that pattern as an image in our page. We could ask the user to save the canvas content as an image and then apply it as a background image for elements on the page, but that would be kind of funny. Instead we can use a feature of the HTML5 canvas that allows us to get the image data drawn on it via a JavaScript method call named toDataURL(). The call would look something like:
[javascript]var canvasImage = myCanvas.toDataURL();[/javascript]
After calling this method canvasImage will contain a string representation of the image information contained in the canvas at the moment of the call. The image information looks like this:
[javascript]”data:image/png;base64,iVBORw0KGgoAAAANSUhEUgAAASwAAAE…[/javascript]
The string indicates that it contains a PNG image content encoded as a base64 string. Don’t bother if that sounds too complicated, it’s actually a format that allows binary information to be stored as letters and numbers. And that’s exactly what we have in this string. This string is called dataURL and we can use it as an actual image in our HTML code by placing it in the src attribute of an <img> tag.
If we modify our example above and first add an image just after the <canvas> tag <img id="myImage"/>. And then after drawing the lines pattern on the canvas we add the following code
[javascript][/javascript]
var myImage = document.getElementById(“myImage);
myImage.src = myCanvas.toDataURL();
[javascript][/javascript]
we will get the canvas and an image displaying the same lines pattern as the canvas.
See the Pen HTML5 Canvas – Drawing lines pattern and setting it to an image by Ion Emil Negoita (@inegoita) on CodePen.16997
Besides using the canvas image data in the src you can also use it as the background CSS property. If you want to learn more about that make sure you read my post Create dynamic backgrounds for websites using HTML5 canvas.
4. Conclusion
I hope you find this post useful. Now you have everything you need to create your own line patterns using HTML5 canvas.
If you want to use classic images for your website background, you have to check out this awesome pack of 90 subtle patterns from Photoshop Supply.

